What are Diecast Model Cars
Diecast model cars are miniature replicas of real-world vehicles, typically made using a die-casting process where molten metal is injected into molds. These models are popular among collectors, hobbyists, and enthusiasts of all ages. They offer a detailed and accurate representation of various car models, from classic vintage cars to modern sports cars and trucks. The level of detail can vary, with some models being simple toys and others being highly detailed replicas designed for display and collecting. Building diecast model cars allows enthusiasts to further customize and personalize their models, turning them into unique pieces.
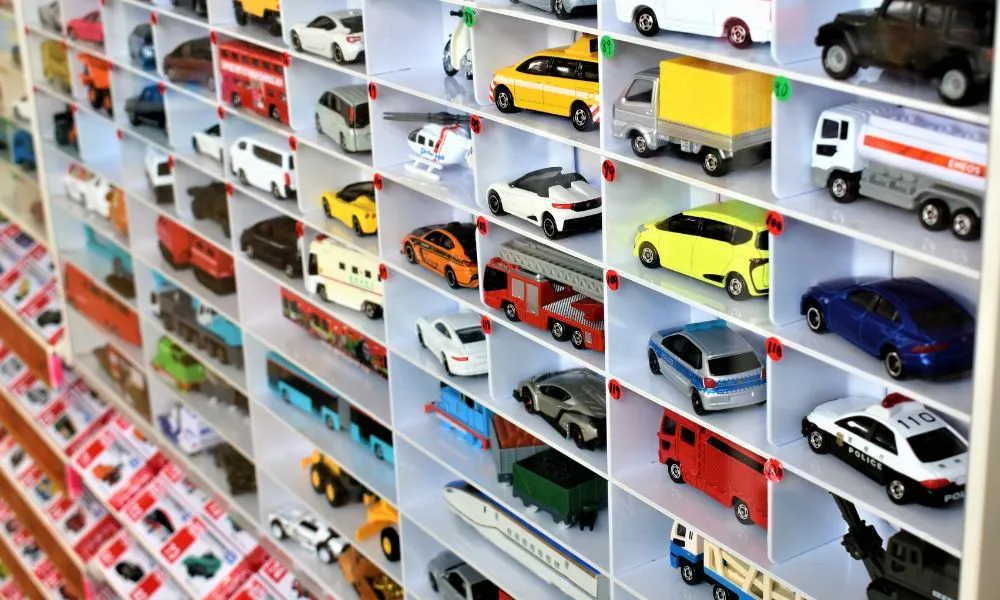
Types of Diecast Model Cars
Diecast model cars come in a vast array of types, reflecting the diverse world of automobiles. You can find models of almost any car imaginable, from everyday sedans and SUVs to exotic supercars, race cars, and even commercial vehicles. The variety extends to different eras, with models representing vehicles from the early 20th century up to the present day. Collectors often specialize in specific types, such as classic cars, muscle cars, or particular brands like Ferrari or Porsche. Furthermore, the level of detail and the materials used can vary significantly, influencing the price and the collector’s interest. Certain models are also released in limited editions, adding to their collectibility and value.
Scale Differences in Diecast Models

Diecast model cars are manufactured in various scales, with the most common being 1:18, 1:24, 1:43, and 1:64. The scale refers to the ratio between the model’s size and the actual car’s size. For example, a 1:18 scale model is 1/18th the size of the real car. Larger scales, such as 1:18 and 1:24, offer more detail and allow for intricate features, making them popular for display and customization. Smaller scales, like 1:43 and 1:64, are more compact and easier to collect in large numbers. The choice of scale depends on the collector’s preference, the available display space, and the desired level of detail.
Gathering Your Tools and Materials
Before you start building your diecast model car, you’ll need to gather the necessary tools and materials. This preparation is crucial for a successful and enjoyable building experience. The type of tools and materials you’ll need depends on the complexity of the project and the level of customization you plan to undertake. A well-equipped workspace will make the process easier and help you achieve better results. Taking the time to organize your tools and materials can save time and frustration, making the building process more efficient.
Essential Tools for Diecast Model Building
A basic set of tools is essential for building diecast model cars. You’ll need a set of small screwdrivers, including Phillips head and flathead types, to disassemble and reassemble the model. Hobby knives or X-Acto knives are useful for trimming parts, removing mold lines, and cutting decals. Pliers, especially needle-nose pliers, are helpful for manipulating small parts. Super glue and hobby-specific adhesives are necessary for assembling parts. Additionally, you’ll need a cutting mat to protect your work surface and a set of files or sanding sticks for smoothing surfaces.
Other useful tools include tweezers for handling small parts, a magnifying glass for detailed work, and a set of paintbrushes for applying paint. A small drill and various drill bits can be used for adding details or modifying parts. It’s also helpful to have a dedicated workspace with good lighting and ventilation, especially if you’re planning to paint your models. Investing in quality tools will make the building process easier and yield better results. Regular maintenance and cleaning of your tools will extend their lifespan.
Materials Needed for Diecast Models

The materials you’ll need include the diecast model car itself, which you can find at hobby stores, online retailers, or even thrift shops. You will also require paints suitable for metal or plastic surfaces, such as enamel or acrylic paints, and various paint thinners or removers. Primer is essential for preparing the surface before painting, and clear coat adds a protective layer and enhances the finish. Sandpaper with various grits (fine to coarse) is necessary for smoothing surfaces. Decals and stickers, along with decal setting solutions, are crucial for adding details. Additionally, you may need putty or filler for repairing imperfections. Various detailing materials such as wire, tubing, and other small parts can be used for advanced customization.
Step 1 Preparing the Diecast Model Car Body
The first step in building your diecast model car is preparing the body. This involves several key steps to ensure a smooth and well-finished product. Proper preparation sets the foundation for the rest of the project, making the painting and detailing processes much easier and more effective. Taking your time and paying attention to detail during the preparation stage is a worthwhile investment. The goal is to create a clean, smooth surface ready for painting and detailing.
Cleaning the Diecast Body
Begin by thoroughly cleaning the diecast body. Use warm water and mild dish soap to remove any dirt, dust, or oils that may be present. Rinse the body thoroughly and let it dry completely. You can also use a degreaser specifically designed for model building to ensure a clean surface. This step is essential because any residue can prevent the paint from adhering properly. Use a soft cloth to wipe the body gently and avoid scratching the surface. Ensure the body is completely dry before proceeding to the next step.
Disassembling the Model Car

Carefully disassemble the model car. Use the appropriate screwdrivers to remove screws and detach parts such as the wheels, windows, interior components, and any other removable pieces. Take pictures or make notes of the disassembly process to aid in reassembly. Place the parts in separate containers or labeled bags to keep them organized. Handle each part with care to avoid damage. Removing these parts allows you to paint the body more easily and ensures a professional-looking finish. Be patient and methodical during this step.
Step 2 Painting the Diecast Model Car
Painting is a crucial step in transforming your diecast model car. Proper painting techniques and the right materials are essential for achieving a professional-looking finish. This involves preparing the surface, choosing the right paints, and applying the paint in several thin coats. Adequate ventilation and a dust-free environment are crucial to achieving a flawless finish.
Surface Preparation for Painting
Before painting, prepare the surface by lightly sanding the body with fine-grit sandpaper to remove any imperfections or scratches. Then, apply a primer coat. Primer helps the paint adhere to the metal and provides a uniform surface. Use a primer specifically designed for diecast models. Apply the primer in thin, even coats, allowing each coat to dry completely before applying the next. Once the primer is dry, you can lightly sand it with very fine-grit sandpaper to smooth out any imperfections.
Choosing the Right Paints

The choice of paint depends on your preference and the desired finish. Acrylic paints are popular for their ease of use, quick drying time, and low odor. Enamel paints offer a durable, glossy finish but take longer to dry and require proper ventilation. Automotive paints can also be used for a high-quality finish, but they often require an airbrush and more experience. Always use paints specifically designed for model building. Consider using multiple coats of paint to achieve a deep, even color. Test the paint on a small, inconspicuous area first to ensure compatibility.
Painting Techniques for a Smooth Finish
Apply the paint in thin, even coats. Avoid thick coats, which can lead to runs and imperfections. An airbrush is the best tool for achieving a smooth finish, but spray cans can also be used if applied carefully. Hold the spray can or airbrush at a consistent distance from the model. Allow each coat to dry completely before applying the next coat. Multiple thin coats are better than one thick coat. Once the paint is dry, you can apply a clear coat to protect the paint and add a glossy finish. Proper ventilation is extremely important when painting.
Step 3 Detailing and Customization
Detailing and customization are where you can truly bring your diecast model car to life. This is where you add intricate details, personalize the model, and make it unique. From applying decals to enhancing the interior, this stage allows you to express your creativity and attention to detail.
Adding Decals and Stickers

Decals add intricate details and markings to your model. Carefully cut out the decals and immerse them in water for a few seconds. Once the decal is loose, slide it onto the model surface. Use a decal setting solution to help the decal conform to the surface and eliminate air bubbles. Use a soft cloth or cotton swab to gently smooth out any bubbles or wrinkles. Once the decals are dry, apply a clear coat to protect them and blend them seamlessly with the paint.
Detailing the Interior
Enhance the interior of your model car by adding details such as seatbelts, dashboard details, and custom upholstery. Use small paintbrushes and fine-tipped markers to paint the interior components. You can also add aftermarket detailing parts to create a more realistic interior. Consider adding flocking to the interior to create a carpeted effect. Pay close attention to details like the steering wheel, gear shift, and instrument panel to make the interior look as realistic as possible.
Step 4 Assembly and Finishing Touches
The final step involves reassembling the model car and adding any finishing touches to complete the build. This is the culmination of all your hard work and attention to detail. Proper reassembly ensures that your model looks and functions as intended. Taking your time and carefully putting all the components back together is crucial to the final outcome.
Reassembling the Model Car

Carefully reassemble the model car, following the disassembly notes and pictures you took earlier. Attach the interior components, windows, wheels, and any other parts you removed. Use the appropriate screws and adhesives to secure the parts in place. Ensure that all parts fit together correctly and that there are no gaps or misalignments. Double-check all connections to ensure everything is secure. Be patient and take your time to avoid damaging any of the parts during reassembly.
Adding Finishing Details
Once the model car is reassembled, add any finishing details to complete the look. This includes adding accessories like side mirrors, wipers, and antennas. You can also weather the model car to give it a more realistic, used appearance. Consider adding custom license plates or other personalized touches. At this stage, inspect the entire model for any imperfections or areas that need touch-ups. A final coat of clear coat will protect the model and give it a polished look.
Where to Find Additional Resources
There are numerous resources available for model car enthusiasts. Online forums and communities are great places to share your work, ask questions, and learn from other builders. YouTube channels offer video tutorials on various aspects of model car building. Hobby stores provide kits, tools, and materials, as well as expert advice. Books and magazines dedicated to model building offer in-depth tutorials and inspiration. Exploring these resources can help you improve your skills and discover new techniques.
Remember, building diecast model cars is a rewarding hobby that requires patience, attention to detail, and a willingness to learn. With practice and persistence, you can create stunning replicas of your favorite vehicles. Enjoy the process, experiment with different techniques, and most importantly, have fun!